Most of your business contacts are probably stored in your company’s computer using Microsoft Outlook. You might want to copy or move these valuable contacts to your Gmail account so that you can access them when you are away from the office or if you are planning to leave the company. To move your Microsoft Outlook contact list to Gmail or vice versa is not that complicated. A few steps away and you can get the work done:
Copy contact list from Microsoft Outlook (2003 or 2007) to Gmail Account:
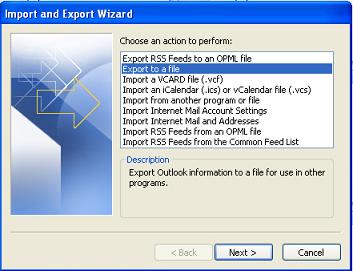
1. Go to your Microsoft Outlook, open File>Import and Export.
2. Select “Export to a file” and click “Next”.
3. Choose “Comma-separated values (Windows)” and click “Next”.
4. Locate your contact list and click “Next”.
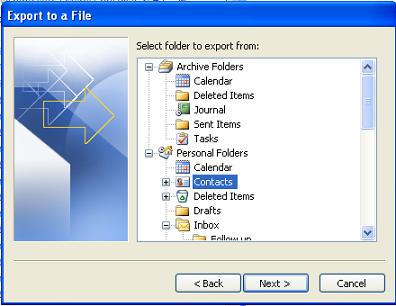
5. Assign a name to the file and save it. The file will be saved in .csv extension.
6. Now log in to your Gmail.
7. Click the “Contacts” on the left pane and subsequently select “Import” at the top right corner.
8. Click browse to locate the .csv file that you saved earlier.
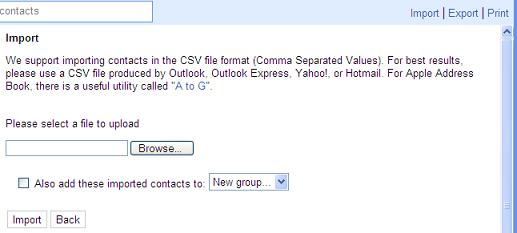
9. You can click “Import” to start importing your contact. Of course you can add these imported contacts to a new group and you can name the group as well.
10. Once the importing process is completed, you will be indicated with the number of contacts added, merged or ignored if there were duplicates.
Copy contact list from Gmail Account to Microsoft Outlook (2003 or 2007):
1. Go to Gmail contact page, click to the “Export” at the top right corner.
2. Choose the list of contact that you want to export. Check the item “Outlook’s CSV format (for importing into Outlook or other application).
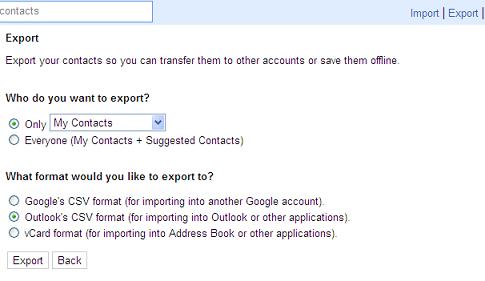
3. Click the “Export” button. The exported file will be named as “contact.csv” automatically. Click the “Save” button to save the file.

4. Now go back to your Outlook. Go to File>Import and Export>Import from another program or file. Click “Next” to proceed.
5. Choose “Comma-separated values (Windows)” and click “Next”.
6. Browse for the file created from Gmail. At the prompted Windows, you will be given options to deal with the duplicate entries. You can allow duplicates, replace duplicates , or do not import duplicates.
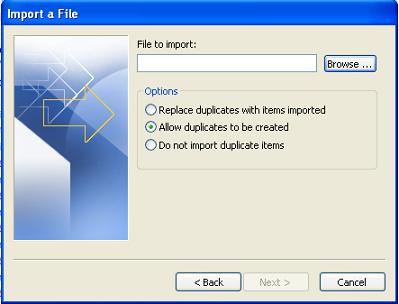
7. Click “Next” to proceed. Choose the destination folder, e.g. Contacts under Personal Folders for your account, verify the action, and click Finish to complete the whole exercise.