One of the main feature (or annoying complaint) about Android-based mobile phone or smartphone such as Motorola Droid, Motorola Milestone, HTC Hero, HTC Magic, HTC Desire, HTC Legend, Google Nexus One and etc, is that there are some apps or processes that consistently want to access, or download and upload data through Internet, especially for auto-sync and status update. When Wi-Fi or wireless connection is not available, the phone will automatically dial and connect to Internet via mobile data connection, such as 2G (GSM/CSD), GPRS (2.5G), EDGE/EGPRS (2.75G), 3G, and HSDPA/HSPA+ (3.5G).
The main problem with mobile data connection is that most data plan from mobile carrier is not unlimited. In other word, the data plan of most mobile voice and/or data plan package often only include limited amount of free data bandwidth (or even no free data bundled or included on pure voice call plan). When connection is established and data is transferred, the free bandwidth allocation is used and depleted. Once the free data transfer quota limit has been used up, users have to pay exorbitantly and ridiculously high and expensive price on extra data bandwidth been used.
In Android OS-based cellphone, it’s possible to disable and turn off mobile data connection, in order to save data cost and prevent from incurring high data charge bill, and also to save batter power. Here’s a few options and alternatives that are possible to turn off data connection.
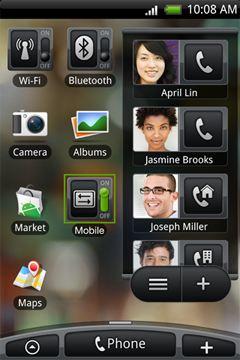
Tip: In most HTC manufactured Android phones, it comes with a Mobile Network widget, which is an on/off switch to quickly turn the data connection on or off on one tap. The Mobile Network option can also be accessed by pressing and holding POWER button to open the Phone options menu.

Method 1: Disable Data Connection on Android Core
To disable and turn off data connection, do the following steps in Android mobile phone:
- Open dialer.
- Dial *#*#4636#*#* to open “Testing” screen.
- Tap on Phone Information.
- Press the Menu key or button.
- Tap on More.
- Tap on Disable data connection to disconnect and make inactive any data connection immediately.
Tap on Disable data on boot to disable data connection on next boot up.
Note: Both options can be selected concurrently.
Method 2: APNDroid to Turn Off Data Connection
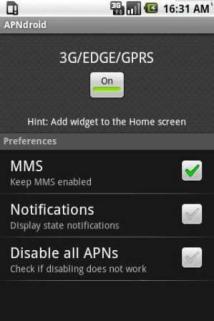
For users who prefer a one-tap widget, there is a free APNDroid available on Android Market. APNDroid prevents the phone from connecting to Internet through cellular data line by modifying the APN names and APN types by adding ‘apndroid’ suffix to them (APN is short of Access Point Name). Best of all, the basic voice call, SMS and MMS capabilities are left intact and working properly.

Method 3: Quick Settings to Disable Data Connection
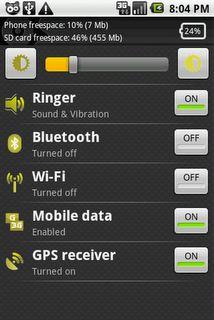
Quick Settings is an app for Android system that allowing users to manage system settings of the smartphone. And one of its function is to turn off or on the mobile data connection, with ability to set it to be hidden and active in the notification drop down menu. Available for free on Android Market.

Method 4: Adding a fake non-working access point
Another alternative is to add a new access point to the Android phone, which is fake, inactive and not working (in essence, APNDroid does the fake APN trick too but it modifies the current APN directly). APN is the name of the service provider’s Inernet network to which the phone will connect to. With a fake APN name and type, the phone will connect to nowhere.
- On the Android phone, press on HOME > MENU button and then tap Settings.
- Tap on Wireless & networks or Wireless controls.
- Tap on Mobile networks or Mobile network settings.
- Tap on Access Point Names.
- On the APNs screen, press MENU button and then tap New APN.
- In the Edit access point screen, enter the APN settings by tapping on the APN setting item to edit it.
Set the Name to a random fake name, such as Off.
Set the APN to a random fake value, such as blank.
Other items can be left blank. - Press MENU button and then tap Save to save the settings to phone.
- A new APN will be shown. Press the circle to the right of the new APN to select it as the active APN.